Showing posts with label Distress Paints. Show all posts

Friday, July 20, 2018

Fun Stampers Journey + Coffee Loving Papercrafters Blog Hop

Today the Coffee Loving Cardmakers team is pairing up with Fun Stampers Journey for a super fun and inspirational blog hop. You should have come here from Lori Turner's blog.


I absolutely love, love, love the quality of FSJ products. Their stamps are sooooo fleepin' cute and I can't wait to show you what I made with thier die cuts, too!


I inked up the Coffee Helps stamp set using some Walnut Stain Distress Inks. 

Image result for fun stampers journey coffee helps 

I painted in the plate using some gold Distress Paint to give it a pop o' elegance and then I splashed the same gold paint on a Hello Word Bubble wooden embellishment. 


A little stamping in the background with the coffee stain stamp, and then some more gold paint and viola! I a clean and simple mixed media card with a whole lotta personality. 


Since clean and simple cards are the complete opposite of my normal style, I had to go back to layering it up and my next card is a shabby chic creation. 


Layers and layers and burlap and twine and lace and die cuts - oh my!!! 

I used the Coffee Helps die set and some pretty paper from Bo Bunny to create my coffee mug.

Fun Stampers Journey is giving away a $25 gift card to a lucky hopper! So hop along, comment on all the blogs, and get some inspiration! Comments close on July 27.

Next up is Dana Gong's blog

Happy Hopping!

Saturday, March 24, 2018

Glimmer of Light Mixed Media Canvas

***Warning*** Photo heavy post ahead so get your eyeballs ready for some visual happiness. 

 I had some messy fun in my studio and I can't wait to share the results with you all!


I've had this bright red canvas staring at me for quite some time. I've always thought it's just been too obnoxiously vibrant, but tonight I decided to conquer it. 


What better way to tone down the red than to cover it up? haha
I used a sheet of old, old music given to me by a bloggy friend and cut it into a face shape. 


I LOVE how easy it is to make emotive faces with the Face It! stamp set from Visible Image.  I stamped the closed eyes onto the sheet music. 


I used some Dina Wakely Scribble Sticks to add some colors to shading. 


Even though Scribble Sticks might not look like much when you scribble them on, as soon as water is added to them, they activate and make all kinds of gorgeousness. Around the edges of my face, I used some Faber Castell Gelatos to add depth and dimension.  I also stamped my background with some numbers from the Somewhere in Time stamp set to grunge it up a bit. 


I took some metal gears and transformed them with some Inka Gold metallic paste. 


I embossed a sentiment from the Glimmer of Light set. 

 I glued down the gears to the top of my gal's head, along with some turquoise gemstones and then sprinkled the whole dealio with some Picket Fence Distress Spray Stains. 

 
Pretty much in love with the way this turned out and no longer intimidated by all that red. 


I had to add the stripeys to the side to complete the whole shebang. 

Thanks for tuning in and have a very happy Saturday!

Sunday, January 1, 2017

Mixed Media Card Challenge - Change

Sniiiiiiiiiiiiiiiiiiiiiiiiiiiifffffffffffffffffffffffff*
Ahhh do you smell that?
That my friends is the smell of 2017 air. The smell of fresh new beginnings. The smell of CHANGE!


Speaking of change, that's the theme for our very first challenge at the Mixed Media Card Challenge for 2017.

When reflecting on what I could do with the theme change, many things came up  - things like new chapters in life, changing colors, changing seasons... What I decided to do was start scrolling through my stamps to see if there were ones that inspired a mixed media piece about changing.

In doing so, I found a NBUS beautiful sentiment from Unity Stamp Co, and a only-used-once Stenciled Women by Dina Wakely stencil. Combined, I felt like the two really spoke to "change".

ken_oliver_colorburst_powder_for_cardmaking_technique

I also thought I could incorporate "change" into my mediums by using Ken Oliver ColorBurst watercolor crystals. I absolutely ADOOOOOORE these things, because you just sprinkle some onto your paper, spritz with water, and you get these vibrant color washes that are totally unique and stunning every time.

creating_mixed_media_backgrounds


Next, I stamped some various shapes across my background in coordinating colors to create more dimension.

tim_holtz_distress_paints_through_stencils

I used some Abandoned Coral Distress Paint to paint through the STAMPlorations Dots All Over Stencil.

using_stencils_and_masks_for_cards


Next, I sponged through the Dina Wakely stencil to create my focal image. 


mixed_media_card_with_dina_wakely_stencil_distress_paint_tim_holtz_distress_inks_unity_stamp_ken_oliver_colorburst_crystals

Wednesday, December 14, 2016

Stenciled Mixed Media Snowflake Holiday Card

Hippity hoppity stencils on their way! Today at the STAMPlorations blog we are doing a fancy-dancy ARTplorations Stencil Hop where we're showing off all the fun techniques you can do with stencils.


As per my regular MO, I decided to get all messy and inky and create a mixed media card. Since Christmas cards are still very much needed (woops!) that's what I decided to focus on.


Before I get too far into the weeds, I wanna talk about the logistics of the Hop - For the next 7 days, we're showcasing stenciling techniques and we'll be giving away at least >5< prizes to those who hop along or make a project featuring stenciling and link it up to our Linky Party Gallery. Check out all the details here.
stenciling_with_ken_oliver_watercolor_crystals
Now, back to my tutorial. I used the Broken Glass stencil for my background and did a little bit of experimentation. This isn't a technique I've tried before - but I'll definitely be trying it again! I spritzed my paper with some water, and then I sprinkled my Ken Oliver Colorburst powders on to the paper. 

Using a paintbrush, I moved the colors around, and left some of the crystals still intact. 


ken_oliver_color_burst_watercolor_crystals_background

I wound up creating 4 different backgrounds - one with a dark usage of powders, one with a light usage of powders, and 2 where flipped my stencil over onto a blank piece of paper to capture the "extra" powder that was left on the stencil. 

OoooooOoooo.


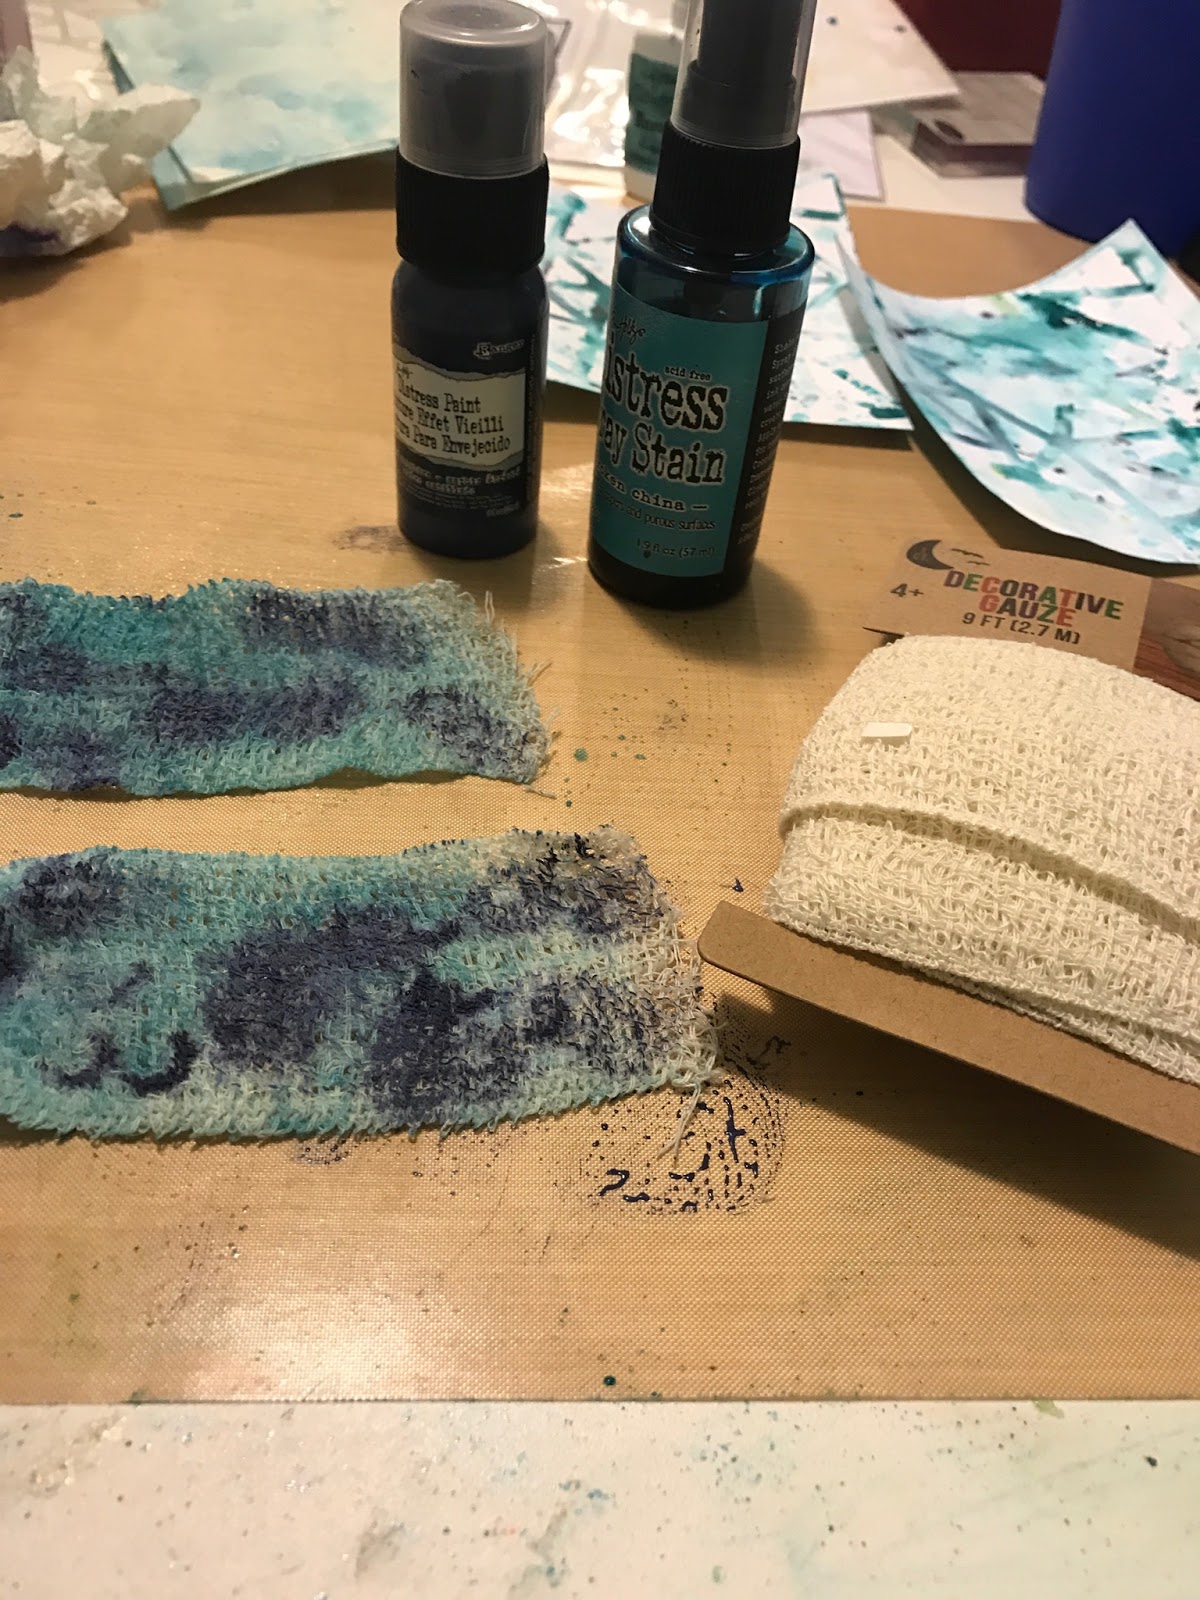
I also used some Distress Paint and Distress Spray Stains to die a piece of gauze for additional texture. Lastly, I altered some chipboard snowflakes with Picket Fence Distress Paint and some sparkly embossing powder. 

 mixed_media_card_christmas_card_snowflakes_stamping

My sentiment is from the Holiday Sketches: Christmas Candles set.

I hope you think this is as pretty as I do! It's so frosty - I can almost feel the crisp winter air just by looking at it! 

Please come join us in our ARTplorations stencil hop! Can't wait to see what you dream up!

My card is going over to play along in:
Mixed Media World Challenge - Winter Wonderland
Mixed Media Mojo - Winter Holiday with a  Sparkle Twist

Simon Say Stamp Monday - Let there be snow


Friday, October 21, 2016

PURPLE! Mixed Media Card with Tutorial

Anyone else out there excited about all the purple cards beautifying the interwebs as of late? I know I am. Thank you SO much for all who have participated in the Hop to Stop this month. I've sent mental high fives to ALL of you!


This post also is going to serve as a reminder to go get your STAMPlorations on and join in on the latest challenge. We've got both a sketch AND a theme so there are plenty of options for you to choose from. Just do it already!


I was in my craft room last weekend and decided I wanted to get really messy. I had a leftover sheet that I'd sprayed with shades of purple Distress Inks for THIS CARD and I stared at it all googly eyed before I decided to just start playing.


I took out my Picked Raspberry Distress Paint and made some random circles (a la the STAMPlorations sketch) and then I ringed the pink with Picket Fence Distress Paint. I used my finger to swirl around the paint and blend it together. Since the Distress Spray background hadn't reacted yet with water, some of the purple color seeped into my wet paint and created a lovely blend of colors.


Next, I used the Folk Flowers set designed by Shirley B for STAMPlorations. I took what was supposed to be the stem of the flowers and bent them in the shape of my circles to create an outline. And then I embossed with white.


I also took my Picket Fence Distress Ink and added some small white circles to my big pink circles.


The last step of the background was to use my Dots All Over stencil and sponge Wilted Violet distress ink to create another layer of circles.


I stamped some of the Folk Flowers onto a piece of scrap paper and colored and shaded with my Distress Crayons.


Then I cut them out and pieced them together. Aren't they so funky and adorable!?! There's a million random flowers you could create from this set. (Believe me. I did the mathematical calculations) (don't really believe me - I have a degree in English, not math you sillies).


I stamped a big ol' sentiment from the Big Greetings sentiment kit and colored it in with purple Faber Castell Big Brush pen.

I also added some little sequins to the background and to one of my flowers.


Then I put it all together and said Taaaaa Daaaaa really loudly. :)
This card was so much fun to make and so much fun to stare at. Fun all around!

Make sure you head on over to STAMPlorations and check out the rest of the design team's handiwork!


I'm going to link this up to Seize the Birthday's lots of leaves challenge and Little Red Wagon's Let's Party - Happy Birthday challenge.


______________________________________________________________

Now - Just a reminder that the Hop to Stop is in full Hopping mode. Last year we had 238 linkups and I'm SO hoping to beat that. 


http://damselofdistressedcards.blogspot.com/2016/10/the-hop-to-stop-2016-raising-awareness.html

If you're wondering what the Hop is - it's a blog hop designed to raise awareness for victim's of domestic violence during National Domestic Violence awareness month. 

One in three women will experience domestic violence over the course of their lives. One in three. 

Please consider making a purple card and to help build awareness for such an important issue. <3 

As a bonus, the hop has over $700 worth of prizes that will be given away by extremely generous sponsors.

Sunday, July 17, 2016

It's My 30th Birthday! And I'm Partying with Prizes!

Woop Woooooooop! 
Today is the day where I enter the decade of the big three - OH!
That's right! I turned 30!!

And I'm partying down in the bloggy way by throwing a Birthday Bash with a card linkup party. And I know I'm supposed to get gifts for my b-day, but I thought it would be nice to GIVE some gifts too, to thank all of my amazing followers for cheering me on for the past two years. So read on to learn what I've got in store for you. 


The Mood Board:

So let's explain how this party works:

1. Look at that fancy mood board and find something you like! Here are some ideas:

  • A bright bold explosion of colors
  • Circular shapes
  • Distressed, rusty elements
  • Unique angles
  • Trees
  • Artsy fartsy experimentation
2. Make a card
3. Follow my blog (most of my giveaways are open whether or not you're a follower, but for my birthday bash I like to celebrate with friends - old and new alike!)
4. Make a blog post using the graphic and a link back here and link up your card at the bottom of this post.

Of course, I had to make a card myself!


I'm sure you can tell which picture was my inspiration for this guy - the tree! I made it using Distress Paint. All those little dots are individual brushstrokes. 


Since we're celebrating birthdays, I'm also playing along at Seize the Birthday where the theme is Bold & Bright. 

Now for prizes! 30 is a big year so I've got some BIG prizes to give away for those who are linking up to my birthday bash.

Prize 1 & 2 - STAMPlorations Gift Cards
I'm giving away 2 gift cards to STAMPlorations for $20 each (a big thanks to Shery for donating the second card - what a sweetie!!)


Prize 3 - A complete Fossilized Amber Set
Tim Holtz Distress FOSSILIZED AMBER Color Of The Month Set Ranger 2015APR Preview Image

Prize 4 - 2 packs of Copic Caio Markers


Prize 5 - A Bundle of Fun


So there you have it! I hope you'll party along with me! 

Link up here:
***NOTE***
InLinkz is deciding to be a poop and not working for some people (though most don't have issues). If you can't link up, just leave your link in the comments section and I will add it. :) Thank you!


Monday, May 16, 2016

My Craft Room Remodel, Supply Organization, & General Awesomeness

EEEEEEE! I'm so excited to finally get to share with you my craft room remodel! I finally got off my lazy arse and took some photos and edited them and now that particular arse is sitting on the couch and typing this post so you can FINALLY all share in my eternal happiness!!!


craft_room_remodel

When we purchased our new home, the garage (which is a separate structure from the house) came with 700 square feet of finished living space. Part of that space is a big ol' "man cave", as my significant other has dubbed it. But the other part was a poker room/bar area. During our initial walk-through I instantly fell in love with this particular room, because I just KNEW it would make my dream craft studio possible. 


craft_room_makeover


Here it is in all its full glory! Isn't it beautiful?! It truly is my new happy place. I love walking into this, with the daylight streaming through airy windows and the smell of ink heavy in the room. I l-o-v-e creating things in here! 

So let me give you a little tour!

The craft table was custom built by my fabulous boyfriend and amazing brother-in-law.

building_a_custom_craft_table

This is my brother-in-law in action.

The table is 10 feet long by 5 feet wide. The base is made of cube storage shelves (purchased from Lowe's). The top was made by cutting 3 pieces of plywood to size and covering it with a white laminate (ordered from Home Depot online). 

I put red storage containers underneath the table to hold things like my ribbon, burlap, and miscellaneous hodge podge.


Taaaaadaaaa! This is my back focal wall. I knew right away that I wanted to use my Distress Products as a sort of decoration. And boy did I ever! When anybody walks in to the room they are smacked with a veritable smorgasbord of color, pulled from all of my favorite products. 


craft_room_renovation

My boyfriend, drilling the back shelf into place ("You have to have a few process photos," I explained to him as he complained about my picture taking obsession duty).

The shelves and cupboards were all purchased from Lowe's over by the laundry storage section. If you get cupboards from the laundry section versus the kitchen section, it cuts the price by well over half. The tall cupboards were about $120 each and the shorter cupboards were $79 each. 

The back wall also has all of my essential tools, such as my paper cutter, my Cuttlebug, and my MISTI. 

craft_storage_supply_organization


Up top, the room is decorated with cards sent to me from my bloggy friends from around the world.

tim_holtz_ranger_distress_paint_organization


Underneath that is a row of Tim Holtz Distress Paints, Distress Spray Stains, and Distress Crayons. 

The products are all arranged on 24" floating shelves, purchased from Menards. 

Tim_holtz_ranger_distress_spray_organization

Zigzag! haha

This wall is not only beautiful, it's sooooo great to have all of my fave products at immediate hand. I use them constantly and now I don't have to rummage around for ages trying to find which color I want. 

storage_for_tim_holtz_distress_inks_and_reinkers

My absolute favorite feature of the room is the storage for the Range Distress Inks. I used nail polish display stands! I used ones that are 6 racks tall and ordered from Amazon. (Here's the link to find them, if you'd like.) They hold 4 Distress Ink pads and their reinkers absolutely perfectly. 


stamping_supply_organization_with_pops_of_color

I also used pops of color inside my cupboards (because let's be honest - they're gonna be open all the time anyhow). This is the cupboard where I store my stamps. I have them in pull-out containers so they can easily travel from cupboard to craft table. 

cricut_station_for_craft_room

Along the front wall, I created a computer-based station which houses my printer and Cricut Expression. I also have a card rack to showcase my designs and store the finished cards so they don't get ruined. Underneath the station I have wooden draws that are filled with miscellaneous embellishments for cards. 


^^This is my face after everything was all done^^ 

This face was made possible by the following people:
My super-awesome-deserves-10-backrubs boyfriend, Jimmy.
My incredible brother-in-law, Nick, who helped with the table.
My awesomesauce cousin, Danielle, who painted like a mofo.
My sister, Allie, who painted (mostly Danielle but some walls, too)
And Jimmy's uber-handy dad, Mike, who helped with SO much!

SO SO SO Thrilled with all the craft supply storage, amazing drool-worthy craft table that holds 10 people comfortaby, and a place for every craft tool that I own. It truly is my dream craft studio!

custom_handmade_craft_table

If you like it, then be sure to put a Pin on it! :) 

Thanks for popping by and I hope you love it as much as I do!