Showing posts with label Visible Image. Show all posts

Saturday, December 5, 2020

Creative Artiste Mixed Media Challenge Guest Design

There's nothing better than the feeling of scrubbing off inky, messy hands after a good play session in the studio. 

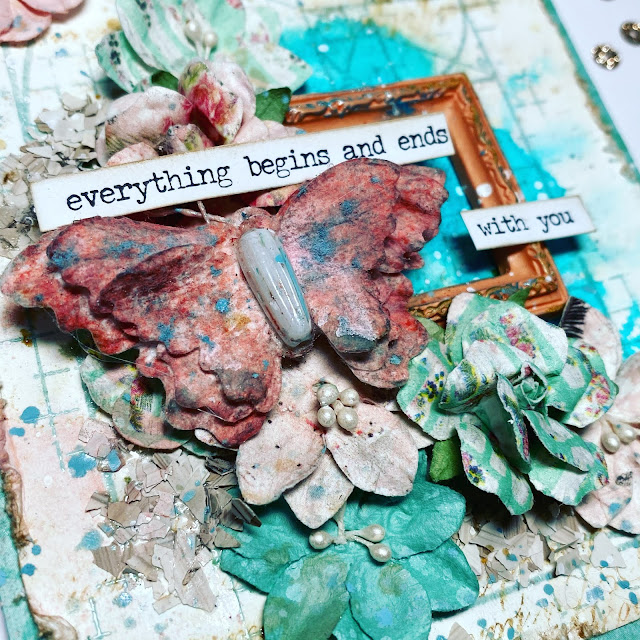
Mixed media handmade card with prima flowers that says everything begins and ends with you

I have the honor of being a guest designer this week over at Creative Artiste Mixed Media Challenge. I happen to love this challenge because it's always anything goes as long as it's a mixed media project. 

One of my friends asked for a special commissioned card for his wife on their anniversary. 


I started with a piece of white background and stamped it with a text background stamp and Walnut Stain Distress Oxide. I spritzed with water and then added two drops of Cosmic Shimmer Watercolour Ink. 

Next, I added another layer of stamping with Visible Images Fibrionaci stamp, embossed in Speckled Egg Distress Glaze. 


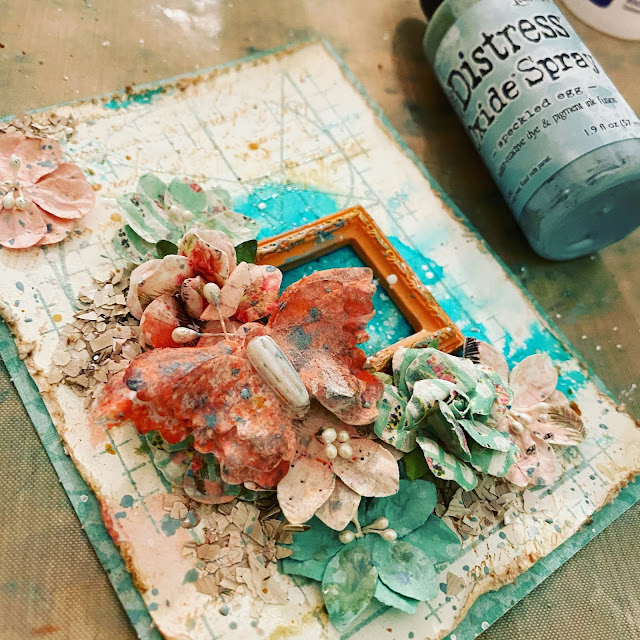
I decided on the different elements I wanted to bring into my card - a peach frame that I covered with blue and gold InkaGold to antique it, and a white butterfly that I sprayed with Distress Spray Stain and then added Speckled Egg Distress Glaze before heat setting it (and almost starting it on fire. :o ) 

blue and coral mixed media handmade card with frame, butterfly, and Priima flowers

I started layering my card with Prima flowers, my frame and the butterfly, and then added little bits of ivory frantage around the edges before dusting it with some Speckled Egg Distress Oxide Spray Stain. 

I added some romantic, gushy words to make it appropriately lovey-dovey for an anniversary and - I've got to say it turned out sooooo pretty. 

Thanks for popping by, and I hope you'll go get all inky and play along at Creative Artiste

Saturday, July 28, 2018

Mad Hatter Tea Party Card

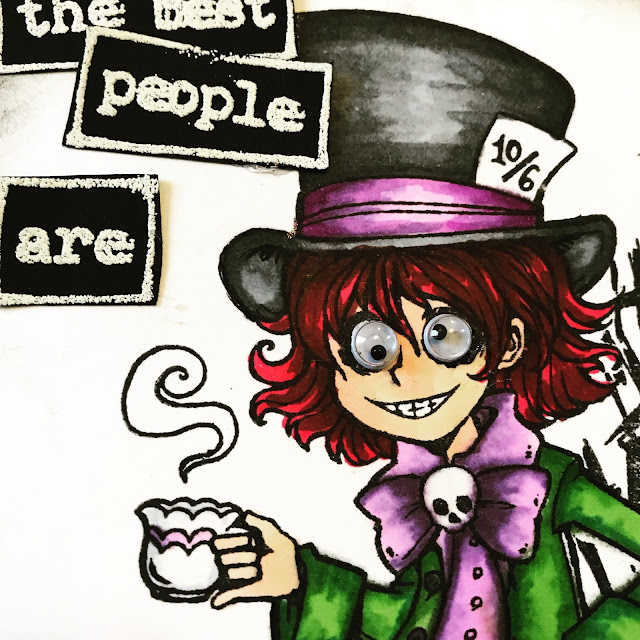
All the best people are bonkers! I've never identified with a Disney phrase more than I have that one, which was spouted by the Mad Hatter in Alice and Wonderland. 


Visible Image just unveiled a whole new Wonderland stamp line featuring Alice in Wonderland characters and they're all so much fun. 


I got to have a play with The Mad Hatter set and, as you can see, added some googly eyes for the full crazy effect. 


I stamped and masked Mr. Hatter so that I could add some of the crazy laughter to the background. 


Ensue laughter stamps. And more laughter stamps. I went a little overboard haha! 


Next, I used some Spectrum Noir alcohol markers to color in my image and smudged up my outside edges with black Faber Castell Gelatos. 


I added a sentiment phrase using the same set, and some pretty patterned paper to match - glued on the googly eyes and viola! One crazy mad hatter. 

Thanks for popping by! Make sure to go check out the full Wonderland release and prepare to be amazed! 

Saturday, June 16, 2018

Unicorns and Gelatos and Circles - Oh My!

Magic was in the air of my craft studio - mostly because I broke out the mythical creatures (namely in the form of a glorious unicorn from the Visible Image Believe in Unicorns stamp set).


Just look at that majesticness!


 To make this shimmering creation, I started with a good base of black and grunged it up a bit using the Fibonacci background stamp. This stamp has quickly become one of my faves because it is so big and covers the whole background of a design perfectly. 


Next, I created my own patterned panel using a sheet of white cardstock and the Universal stamp set, which has all these scribbly circles.


I used three colors of extra bright gelatos to add a pop of color to my creation. 


I love working with Gelatos - there are so many ways to use them. If you haven't tried them, they're a sort of gel-like crayon that is water soluble. So you can use them as crayons, or mix them with water for unique watercolor effects.

 For this technique, I applied a thick layer and let the colors overlap as I was scribbling, then I used my fingers to blend the colors together.


I put everything all together, and created a my unicorn focal circle, then added a sentiment from the Go To Words stamp set. 

Products Used:

https://visibleimage.co.uk/product/go-to-words/https://visibleimage.co.uk/product/believe-in-unicorns/


https://visibleimage.co.uk/product/universal/ https://visibleimage.co.uk/product/fibonacci/

Thank you all for popping by!

Saturday, May 19, 2018

Friends are Angels Stamped Card

I am in LOOOOOOOVE with the new releases at Visible Image.


One of my favorite new sets is So Much Stronger, which has all of these gorgeous sentiments that are bold and powerful (like the one I'm using in my card).


I have been hoarding erm... carefully saving some Tim Holtz angel wings and as soon as I got my hands on this gorgeous set, I finally had the perfect card to use them on. 


I'd chosen some teal and warm brown papers to use on my card, so I wanted my silver wings to match. InkaGold to the rescue! 


InkaGold is perfect for altering chipboard, paper flowers, and metal pieces. It can be used as a paste, or mixed with water to create watercolors. 


After I smudged with teal, I added a second layer of light gold. OOooooo shiny!


I used the same gold around on a die cut piece that would be my focal panel for my sentiment.


Sponged around the edges with some brown Distress Inks to give it a vintage vibe. 


I added a ribbon, and embossed the lovely sentiment and I have one stunner of a final design!

Saturday, May 5, 2018

Live Like Tomorrow Doesn't Exist

Happy Weekend! 
Today, I've got a card for you that's full of vibrant colors and movement. I was experimenting and trying out different combos of stamp sets and happened upon one particular duo that made my heart do all sorts of leaps. 


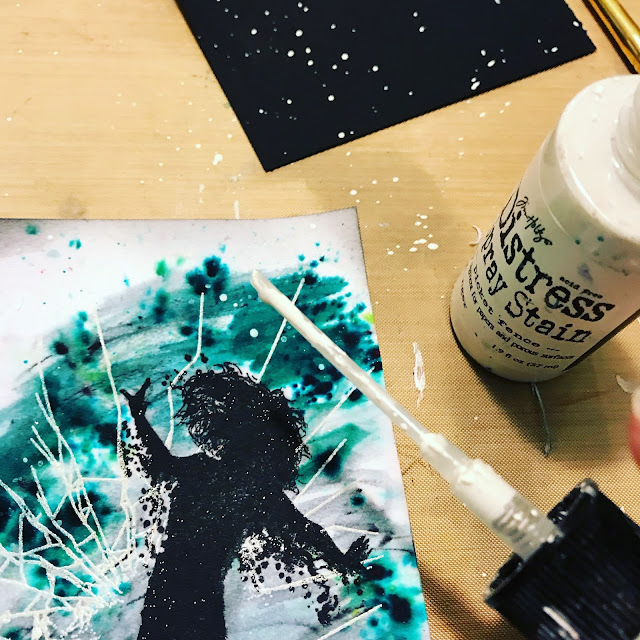
To start my design, I stamped and masked the jumping girl from the Visible Image Tomorrow Doesn't Exist stamp set. 


After I masked her up, I used the How Fragile stamp set, embossing it with clear powder. 


Next, I spritzed the page with water and sprinkled on some turquoise Ken Oliver Color Burst crystals.


I spritzed again with water and let the crystals work their magics. I wanted a little more movement so I used a wet paint brush and made hard side to side strokes. 


I splattered the whole thing with Picket Fence Distress Spray Stain.


I embossed and fussy cut a sentiment from the same
Tomorrow Doesn't Exist set. 


Put it all together and ba-blam! OOOoooooo

I love the way this turned out with all the movement happening! Thanks for popping by and have a lovely Saturday!

Friday, April 27, 2018

Visible Image + MISTI blog hop + PRIZES!

Hello Friendly Friends! I've got a blog post today that you're not going to want to miss out on. If you love Misti, or you love Visible Image stamps read til the end because there's 100 smackers worth of prizes up for grabs. *insert gasping noise here*


When the MISTI (short for most incredible stamping tool invented) came out, I definitely shelled out all my crafty savings to buy one because they are AMAZING. I use masking frequently as a technique, when I design cards and got so frustrated whenever I'd stamp an image that wouldn't be right on. The MISTI allows me to restamp the image in the exact same place every time. Believe me when I say that whatever I paid for the tool has been more than made up for in the cost of paper I would have had to chuck otherwise. haha.


A few months after they released the full MISTI, they dreamed up the mini MISTI and I'm so happy to get my hot little hands on one. I like the full size one because it's nice for using with large background stamps, but the mini appealed to me because it doesn't take up so much of my table space and I can keep it in arm's reach. And it's sooooo cuuuuuuuute. hehe
As you may know, if you're a regular reader of my blog (if not ->> hit the subscribe and I'll be forever grateful!) I am not a huge CAS fan. Mostly because if I even look at white space crosswise it somehow winds up with ink all over it. 


So rarely - if ever have I attempted the triple layer stamping technique. Since I had the handy dandy mini MISTI, I decided to give it a go. I cut 3 sheets of blank paper and stacked them atop each other, securing them in place with the magnet that comes along with the MISTI. 


I placed and inked my stamps - these moths come from the Glimmer of Light stamp set from Visible Image, which is freakin' gorrrrgeous. 

Check it! 


I stamped on the first layer, and then removed it, stamping again on the second layer, removing, and then repeated all the way until I only had the last layer to go. 


I repeated this on both sides of my card, before inking up a sentiment from the Shining Bright stamp set using VersaMark embossing ink. 


Shining Bright is another one of my fave sets. Visible Image always has the most unique sentiments and I love the slightly grungy feel to all their designs. 


I stamped a lightbulb and watercolored it, fading it out until the outer edges were a soft yellow. 


I added in some InkaGold to give the lightbulb some real life shimmer. and then speckled my card with flicks of yellows and golds. 


Once I had all my layers, I used mounting tape to give them a little lift in between. 


Taaaa-daaaaaa! I never would have attempted this technique without the MISTI. If you haven't invested in one, you neeeeeed to. Like not even a want. It's a need. You will never regret it.

Oh yeah - I mentioned prizes.


Both Visible Image and MISTI are offering a $50 shopping spree!!! Winning is pretty simple, just go have some inspirational fun along the hop with these folks: 

Becca Cruger <--- YOU ARE HERE
My Sweet Petunia

Leave a sweet comment on each post and two lucky commenters will win. :) 
Comments must be left by Monday, April 30 11:59 p.m. CST. Winners will be announced May 1st on the Visible Image and My Sweet Petunia blog. 

Happy Hopping, friends!