Wednesday, March 18, 2015

Easter! Crafty Gals Corner Challenge


 How many of you are also ridiculously excited to stuff your face with Cadbury Eggs and jealously watch as the kids get to have all the fun of finding the hidden eggs? Stupid adulthood.Takes all the fun out of everything!


Easter seems to be coming up so quickly and this week Crafty Gals Corner helped to remind me that I should probably make a couple of cards to send along with the Easter baskets I'm making for my nieces and nephews. 


The theme at Crafty Gals Corner is Hippity Hop - Make an Easter project. 

I was really feeling the springtime when I created this card, let me tell you! I found the brightest happiest papers I had and colored up the eggs to match. I popped out the bottom one and I popped out the basket edging to achieve a little visual dimension. 


I also go to practice my coloring and shading skills, which I'm pretty pleased with. 

So what are you all making for Easter this year? Come and show us at Crafty Gals Corner!! 

http://craftygalscornerchallenges.blogspot.com/2015/03/challenge-11-hippity-hop.html


We've got great prizes this week!

Our sponsors this week are:


Prize: $10 Gift Certificate


AND


Prize: $10 Gift Certificate

I'm also going to link my card up in support of these great challenges:

Addicted to Stamps and More - Anything Goes
House of Cards - Use enamel dots
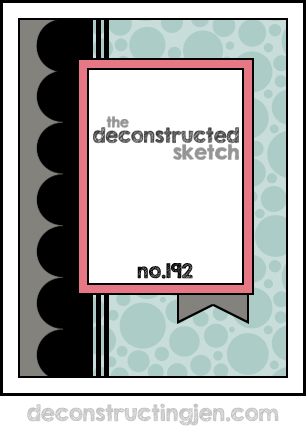
Deconstructed Sketch - thanks for the awesome layout
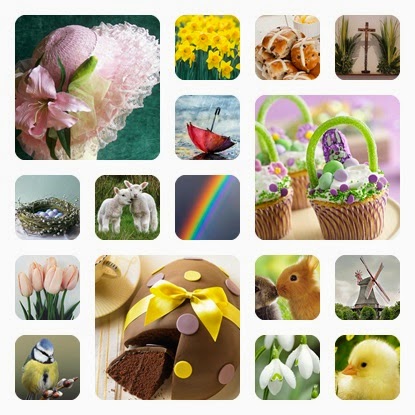
Simon Says Stamp Monday - Spring mood board
Deconstructed Sketch 193SSS Pinterest challenge
 Sending lots of crafty love! Thanks for popping by!

Tuesday, March 17, 2015

CAS? Yep, I can! Guest Designing at Cardz 4 Guyz

It's always tricky when a challenge blog asks you to guest design for them, because you never know what challenge they'll assign you before you say a (in my case) very resounding, happy, gleeful, giggling yes!!!!

If you've been following my blog, you know that I was asked to guest design for the WHOLE MONTH over at Cardz 4 Guyz. Now this already stretches my crafty muscles because most of my work is extremely girly and frilly and glittery and all the other good things in life.

But this week my muscles are definitely going to get a workout because the challenge is:

Clean. And. Simple.

Cue dramatic impending doom theme music here.

But I did it!!!


Luckily for me, I had a really good other inspiration for this piece. My boyfriend just started a new yesterday. Since he's worked for 15 years at the same company, this is a major change for him!! It essentially doubles his salary (momma needs a new pair of shoes) (just kidding - I'm very self sufficient) but it comes with some drawbacks - namely that he has to start at 3 a.m. and has to work every Saturday - blargh!

So I set this card out, along with a pack of coffee, a breakfast bar, and a new pair of work gloves to make his first morning a little less awful.

I actually love the way it turned out! I used an embossing folder on the background and then I embossed a suit from Penny Black's Lost Without You set.  I finished it off with a (very true!) sentiment from STAMPlorations Blossom Overture.

So Haha - Cardz 4 Guyz!! You didn't stump me. I know you all need some more manly man cards in your stashes, so you should go play along!

I'm also sending my card over to the following challenges:
Virginia's View - All things Embossed
Addicted to Stamps - Celebration (because it was to celebrate his new job)
Through the Craft Room Door - Anything Goes

Monday, March 16, 2015

Oh Christmas Wreath, Oh Christmas Wreath - STAMPlorations Sketch Challenge


Deck the halls with spring and sunshine Fa la la la la, la la la la! Maybe it's all the warm weather, maybe it's the excess vitamin D, but I have finally recovered from the Christmas card overload that happens from November to December. 

By the way - this is my 2nd post of the day (sorry, I usually try to put them in one, but they needed to be posted at different times). I got asked to guest design at The Challenge, and I would be so super happy if you looked at my first post of the day, too! You can find it >>>here<<<!! 


Anywho, I'm making a card for STAMPlorations latest sketch! I also wanted to play along at Jingle Belles challenge Mission: Embossible (because I love a good pun and just can't resist!) Hence, the Christmas card. 

I wanted to incorporate both wet and dry embossing so I started with a piece of patterned paper and a cool circley-ish embossing folder:


I kinda like how the pattern looks underneath the embossing. Next, in order to really bring out the raised parts, I used Perfect Pearls Green Patina to add a little shimmer:


Lastly, I dabbed some embossing ink randomly over sections of the raised area for a little extra contrast, texture, and shimmer. 


Next, I set to work making a display panel. I used the fabulous, sketchy wreath from the Joyful set and inked it with Perfect Medium before painting over it with Perfect Pearls again. 


Somebody commented that PPs weren't the latest and greatest product, making it seem like they were retro, but they will always be fresh in my book!! You can do so many cool things with them!! And they create the most gorgeous shimmer. 

Anyway, back to the design! I added some felt and embossed a sentiment and....


Taaa daaaaa!

So play along with STAMPlorations sketch challenge and you could win some pretty neat things. Like some free digi stamps or a chance to be a guest designer!!! 

Speaking of, my amazingly talented friend, Robyn Oliver, is guesting with us this week, along with the awesome Stephanie and Kathy! Go check out what they did!

As for me, I'm linking up to the following challenges, too:
Naughty or Nice - Go Green (I'm definitely being nice) 
Jingle Belles - Mission Embossible
Pile it On - 3 of something (3 wreaths and 3 layers) 

Thanks for stopping by! Leave me a comment and I'll be sure to return the favor! 

The Challenge - Guest Designer


You guys! You guys! You. GUYS! It was over 70 degrees this weekend. In March. In North Dakota. I feel like I'm living in a Dr. Seuss book or something with all the topsy turviness going on. Usually it doesn't reach 70 degrees until June and even that's a big IF. 

Anywho - I've been enjoying the GLORIOUS weather, but do you know what I enjoy even more!? Getting to hang out in the blogosphere with the amazingly talented design team over at The Challenge. They asked me to be a guestie for them this week! Woohooo!

Here's my card! 
Can you tell I was inspired by the springtime weather?


The more important inspiration, though is the color combo and sketch that The Challenge provided. If you've never played along over there, you can use either the sketch OR the color combo OR both if you wanna be an over-achiever.


Displaying 27.png

The butterfly is from STAMPlorations Trendy Butterflies set and the sentiment is from Bloom Sketches. The main panel is from Winnie & Walter Essentials: Katherine Cutaways. I used a grey marker to add the faux stitching. 

Anyway, if I say pretty pretty please, will you go check out The Challenge, become a follower, and play along? I promise you'll get some super sweet ladies commenting on your great artwork - and who doesn't love that?!

I'm also going to link my card up to support the following challenges:
Simon Says Stamp Wednesday - Things that Fly 
Simon Says Stamp Work it Wednesday - Spring
Aud Sentiments - Use a Two-word sentiment

Thanks for popping by! Leave me a comment and I'll be sure to return the favor!

Friday, March 13, 2015

Featured Friday!!! - Laura Jane Head


Two evenings ago I screamed at a piece of card stock. Screamed. And then I cried a little, too.
But before I jump ahead of myself, let me begin at the beginning.

If you are a faithful reader of this blog, (bless your hearts and everything else about you!) then you know that I have a special little segment called Featured Fridays in which I tell you all about an inspiring blogger I've met over the Internets and now have the pleasure of calling a friend. 

As I was considering a featuree for March, I saw a stunning creation and just knew that I wanted to showcase Miss (or Mrs., I guess - sorry fellas)

My Photo

Laura Jane Head

I'd bumped into Laura's blog due to some awesome gallery images that I had to click through to check out, but really got to know her more after we both made the DT cut over at STAMPlorations. She's so sweet and talented AND she wears amazing hats - so yeah. It's like a perfect friendship match, right?!

Laura Jane has been married for 23 years (wowzas!!) and has 6 awesome kiddos (double wowzas!!) whom she home schools. Well, actually, two of them have graduated now (to which Laura Jane says a resounding YAY!!). Laura Jane loves art therapy and crafting is her favorite way to relieve stress. 

Here's the thing about Laura's work... it is AMAZEBALLS! Seriously, the things this woman does with a couple of stamps, a layer of cardstock, and some ink leaves my jaw a-thuddin' every single time. Her creations are vibrant, clean, and have amazing depth.
Here are some of my favorite Laura Jane originals:


She's got a signature style that makes me smile every time I see what she's dreamed up. 

But why let me do all the talking, here's 7 great things Laura Jane can tell you about herself:

1. How did I get my start in stamping?


Traditional school was not for me..starting in the fourth grade, cutting class so I could create things with paper/fabric paints and thread became the norm. I found that I could make up an entire week's worth of homework in a few short hours and still keep a good GPA. Art was the only class I excelled in, however, drawing frustrated me and  my handwriting, (worse than any doctor's) always seemed to mar the finished product. I've always enjoyed creating handmade Thank Yous and Christmas cards. When my kiddos got old enough to help make cards I looked into making the sentiment easier.
In 2010 the Stamp maker from TC looked like just what I needed, however I could not get my printer to work with the program correctly..on to plan B..Ready-made stamps:))) and then the clear stamps... Best find EVER!!! And then I found all the video tutorials sharing how to use stamps with techniques other than the usual ink pad and stamp. YAY!!

2. Who/what is my biggest crafty inspiration?


The desire to grow my personal relationship with Jesus and think on pure, lovely things and pass that on to others is my drive. My love of Flowers, Technique videos, Pinterest and Fabric designs are my biggest inspiration starting points.

3. If I were to be any crafting product, it would be....


A blank piece of paper. The possibilities are endless in the hands of my Creator!

4. You'd never guess it, but my biggest crafty secret is ____!


REALIZING that something perfect is not going to come from me, but gives a certain freedom to get messy and take chances. I am mortally flawed from the beginning of my existence. Anything Beautiful and GOOD comes from my Heavenly Father, which also includes my art.
I'm not afraid of making a mess if I'm keeping my eyes on Him. He creates the Masterpieces through me.


5. What are some of my favorite challenge blogs to play along in?


  • Virginia's View...I love how her family gets involved in the Spotlight feature:)
  • STAMPlorations Challenges....The owner, Shery, really encourages that experimental element in creating!
  • The Card Concept.....Where I've learned what the different card making styles are.
  • PTI Make It Monday...Good place to learn the latest techniques.
  • Waffle Flower Challenge...I just like their simple designs.

6. How many stamp sets do I have that I've never used before?


This is embarrassing to say...more than 50...I just got a haul of new Stencils too :/

7. My biggest advice for new bloggers/stampers would be _______________.


Don't get caught up in the need for affirmations left in comments. He Knows My Name by Francesca Battistelli is a good reminder for me.


-----------------------------------------------------

 Choosing a card to CASE from Laura Jane's stash was not easy!! There were so many beauties that I had to stare at them for awhile before I could decide. 


The Original:


Ultimately I wound up going with a card that I knew would require a lot of work - I just didn't realize how MUCH work because I'd never tried to masking before, really. But I fell in love with the depth that was on one tiny layer of cardstock and I was determined to take the plunge. 

Laura Jane's CASE:


I can't believe that I could love any card as much as the original, but Laura Jane outdid herself with this springy creation here! It's an entire bouquet of gorgeousness!! 

My CASE


I stuck pretty darn close to the original. I loved the mandala-esque flowers. Now. Back to the screaming bit. Let me just explain to you that masking is HARD! Firstly, you have to make sure that every image stamps correctly the first time or throw away the paper. Even if you stamp 3 images right and then the 4th one is slightly off throw away the paper or if you smudge the ink while you're trying to hold down the mask throw away the paper. And then you finally do get it all placed exactly right without smudging and you stare at it for a second and gulp because you're now too terrified to make a mistake whilst coloring!! 

Haha - I went through two-and-a-half hours and five sheets panels of cardstock before I was satisfied. :) 

I'm going to send my card on over to the following challenges:


But Laura Jane also kindly sent over some of her masking tips and I thought I'd share them with you (in case you haven't masked before either):

  • Stamp on Post-it notes that are FULL ADHESIVE for the masks. Then save then for future use:)
  • Add grey to shadow the images...it hides a TON of "outside the lines."
  • Blenders also can do wonders for creating cool effects like that around the inside of the heart.
  • Start with a natural fiber cardstock like PTI Rustic Cream...again it hides a lot due to the varying flecks of color.
  • I like to use many different mediums to color with, layering them to make it look "like I meant to do that" :)
So there you have it, this has been another episode of Featured Friday, brought to you by the letter M. 

Now PLEASE go leave Laura Jane some awesome comments on her blog! I know it would make her day! 

Wednesday, March 11, 2015

Buttons and Bows at Crafty Gals Corner and Blog Candy Winner

Hello friendly Friends! 

I'm finally back from vacation and settling back into things. I spent a full evening on the couch last night recuperating from auntie-overload. I only get to see my niece and nephews rarely, since they live 5 hours away and I gotta get as many hugs, kisses, and secret candy behind the backs of their parents in while I can.

But onto the serious business of crafting! This week over at Crafty Gals Corner, we are having a challenge to use either buttons or bows in your creations. 

I'm a big ribbon-lover, myself, although I always seem to forget to use it! A big ol' bow just adds so much to the design. 

I worked with a great digital sentiment called Happiness Sunbeam from Eureka Stamps. It reads:
"Happiness is a sunbeam... When it strikes a kindred heart, like the converged lights upon a mirror, it reflects itself with redoubled brightness. It is not perfected until it is shared."


I am a person who always looks at the proverbial glass and sees the rainbow reflected in the water and never considers the fullness at all. Sure, there are days that can be gloomy, but I am overwhelmed by the sheer propensity of kindness that is found right in front of my nose - if only I look for it. 

So when I read this sentiment, it sort of just stuck there with me.  I knew I wanted to make it bright and cheerful, hence the sunbeams (which are stenciled from a Wendy Vecchi for Stampers Anonymous "Sunburst" stencil). 

I also stamped this vintagey looking pensive lady from the Passion for Art Set because she seemed to match the sentiment really well. I added a die cut frame and a big ol' gold glittery bow and...


Ta Daaa!

So add a little bow, or glue a little button and link it up to Crafty Gals Corner for your chance to win an awesome prize of three free digital images from Eureka Stamps!


I'm also sending this card over to: 
Make Art Challenge Blog - Stencils
Simon Says Stamp Monday - B is for... Bow!
Fashionable Stamping - Springtime
Cupcake Inspirations - Sparkle (that gold sparkly ribbon does the trick, I think!)
 

A couple of things before I leave: Many of you asked about the inflatable robotic R2D2 and so I am happy to report I have a video for you!


They sure had fun and so did I!! Hope it left you with a smile!

Also - I have the winner of my blog candy for the coffee lover's blog hop! There were so many comments and I want to say a big thank you to everyone who made me grin with your kindness - The winner is....


#91 - Lynn Hardy! Congrats, Lynn! I'll be emailing you shortly for your address.

Tuesday, March 10, 2015

STAMPlorations Stencil Blog Hop last day and Cardz 4 Guyz Guest Design


This post is going to have to serve double duty! It's been a crazy hectic week with blogging and vacationing, but I've had a ton of fun. Tomorrow starts the 5-hour car trip home (so maybe I'll have time to catch up on my commenting!). 

As you maaaaaay have gathered from the last 3 blog posts, STAMPlorations is hosting a 3-day blog hop to showcase the new stencil line. I've had the privilege of showcases some of them, along with new techniques every day. 


I've already covered stencils and embossing paste; stencils and Distress Paints; and stencils and Spray Stains. Today's technique is:

STENCILS AND SPONGING

Sponging is probably by far the most common way stencils are used. But that doesn't mean I don't want to show off how to do it, because great results can be achieved! That's why it's such a popular technique - doy!

I began by creating an entire sponged background using Distress Inks (Picked Raspberry, Honey Mustard, Spiced Marmalade... and now I'm hungry)


Once I had all the colors blended to my satisfaction, I put the Shutters - ARTplorations Stencil over the top, taped it down really good so it wouldn't move, and used a sponge to dab black ink through the stencil. 


The background turned out totally cool and made me want to whip out some scrunchies and legwarmers because I felt like I was in the 1980s again. 

I pulled out my trusty blackboard dies and used Perfect Pearls to add a shimmery sentiment. 


Perfect Pearls are a really cool medium, too. There are TONS of ways to use them. I've highlighted several of their uses in past blog posts, so if you want to learn more, just click on the little orange tag at the bottom of this post that says "perfect pearls". 

But I digress, here's my finished card:


I found these funky cool acrylic flower bursts from Basic Grey and fell in love. I also added a big ol' bow to complete the look. 

I'm sending this card over to the following challenges:
Happy Little Stampers - Sponging
Mixed Media Card Challenge - Hints of Spring
Mixed Media Place Creative Gym Exercise - black background + all the colors of the rainbow

As for YOU - if you haven't joined the fun at STAMPlorations, it's not too late! There's over $75 worth of prizes being given out on this hop-a-long and some of it could belong to YOU! Check out what the rest of the team made! You'll find links to all our projects here.


------------------------------------------------
I also want to showcase the card I made for Cardz 4 Guyz! It's the start of their new challenge this week - Hobbies! I get the immense honor of being a guest designer over there for the whole month of March! woohooo!

Here's my card:


Unlike my normal style, this is very CAS. I embossed all of the compasses in a navy blue and distressed some of them so the images wouldn't all be whole (imperfection is my favorite). I sponged the edges with Distress Inks and embossed the sentiment. The photo above doesn't do the sentiment justice, 


Stupid lighting! It says "I would be lost without you". Once of my father's favorite hobbies is exploring the outdoors. He taught me how to use a compass (although now he's gone "soft" and upgraded to a GPS). Thanks to my Pop, I know how to call squirrels (be really quiet and hit some stones together), start a fire with flint and steel, find deer trails, and identify poison ivy. Barring the last one, I don't really put much of these things to use... I'm more of a stay indoors and stamp kinda girl. But hey - if the zombie apocalypse ever happens, I've got a leg up, right?!

So if you make any manly cards - go enter them in Cardz 4 Guyz!!

I'm also going to enter this one into the following awesome challenges:
Virginia's View - Embossing
Just Us Girls - Masculine 
Simon Says Stamp Monday - B is for... (Boy!)

Thanks for popping by! I'll be back to my normal self  later this week and will be coming for as many visits as I can fit in!